Objective
Define a function to programmatically create a uniform grid inside a given element.
Description
It's more than likely that you have worked with graphhs at some point in your life, whether at school or at work. And if this is the case, then you might as well be familiar with the idea of plotting graphs.
When plotting a graph manually, we typically use a graph paper, sometimes also referred to as a grid paper. It has a uniform two-dimensional grid laid out whereby it's very convenient to plot a given point within the bounds of the graph created.
The figure below shows an example of such a grid:

Now in this exercise, you have to define a function createGrid() that creates such a grid inside a given element, taking a couple of configurations as well.
The function shall take three arguments, as described below, in the given order:
- The element inside which we want the grid. This is required.
- A number representing the distance between the grid lines. This is optional and defaults to
10. - A Boolean specifying whether the grid lines shall be thick or not. A thick grid line is one that is 2px wide and a normal one is just 1px wide. This is also meant to be optional and defaults to
false.
If the first argument is not an element node, or if the second argument is not a number or is not within the range 5 - 100, or the third argument is not a Boolean, you MUST throw an error and explain the reason of the error nicely.
There are as well certain things that the grid created by the function must abide by. They are listed as follows:
- The lines that run through the origin must be black in color.
- Each fifth line must be a bit lighter in color (for e.g. grey,
#aaa, etc). - The rest of the lines must be the lightest of all in color (for e.g. lightgrey, or
#ddd, etc). - The origin point must be at the center of the element.
Note also that you MUST solve this exercise in a procedural style,
Shown below is a simple example:
<div id="d1"></div>#d1 {
background-color: #f1f1f1;
overflow: hidden;
position: relative;
width: 300px;
height: 300px;
}// createGrid() defined here.
createGrid(document.querySelector('#d1'), 6, true);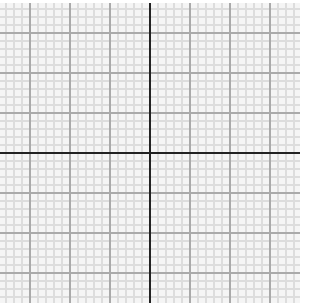
The grid is drawn inside the #d1 element with the spacing between the grid lines set to 6px and the grid lines made thick (i.e. 2px wide).
New file
Inside the directory you created for this course on JavaScript, create a new folder called Exercise-51-Grid-Lines and put the .html solution files for this exercise within it.
Solution
As is customary in programming, we'll start off by the desing stage where we create the stuff that'll be later on required in the actual program.
And for us, that's the HTML + CSS styles for each of the grid lines.
So starting the design stage with considering a plain grid line, we'll call it .grid_line following the BEM naming convention.
Note that although there isn't anything such as a .grid in our current design, it isn't technically wrong to use a name like .grid_line. The word .grid here could simply refer to any element that holds .grid_line — it doesn't necessarily have to be a .grid element.
Moving on, we'll call the main grid line (the one that runs through the origin) .grid_line--main. Another possible name could be .grid_line--origin, but we'll stick to the former.
A horizontal line will be called .grid_line--hz while a vertical line will be called .grid_line--vt, with the respective abbreviations.
Following this same convention, each fifth line will be called .grid_line--sub-main. Another option it to call each non-fifth line .grid_line--light following the fact that it is of a very light color, but we'll stick to the former approach once again.
A thick line (i.e. the one that is 2px wide) will be called .grid_line--thick.
So in total we have the following 6 classes.
.grid_line— generically represents a grid line..grid_line--hz— represents a horizontal grid line..grid_line--vt— represents a vertical grid line..grid_line--main— represents a main grid line..grid_line--sub-main— represents a fifth grid line..grid_line--thick— represents a thick grid line.
Let's now style each of these classes in CSS. Fortunately, this is going to be really elementary:
.grid_line {
position: absolute;
left: 0;
top: 0;
background-color: #ddd;
}
.grid_line--vt {
width: 1px;
height: 100%;
}
.grid_line--vt.grid_line--thick {
width: 2px;
}
.grid_line--hz {
height: 1px;
width: 100%;
}
.grid_line--hz.grid_line--thick {
height: 2px;
}
.grid_line--main {
background-color: black;
z-index: 2
}
.grid_line--sub-main {
background-color: #aaa;
z-index: 1;
}With the styles laid out, now let's test them on real elements. In the HTML markup below, we have each of them:
<div id="d1">
<div class="grid_line grid_line--vt grid_line--main" style="left: 10px;"></div>
<div class="grid_line grid_line--vt" style="left: 20px;"></div>
<div class="grid_line grid_line--vt" style="left: 30px;"></div>
<div class="grid_line grid_line--vt" style="left: 40px;"></div>
<div class="grid_line grid_line--vt" style="left: 50px;"></div>
<div class="grid_line grid_line--vt grid_line--sub-main" style="left: 60px;"></div>
<div class="grid_line grid_line--hz grid_line--main" style="top: 10px;"></div>
<div class="grid_line grid_line--hz" style="top: 20px;"></div>
<div class="grid_line grid_line--hz" style="top: 30px;"></div>
<div class="grid_line grid_line--hz" style="top: 40px;"></div>
<div class="grid_line grid_line--hz" style="top: 50px;"></div>
<div class="grid_line grid_line--hz grid_line--sub-main" style="top: 60px;"></div>
</div>/* .grid_line styles defined here... */
#d1 {
   background-color: #f1f1f1;
   overflow: hidden;
   position: relative;
   width: 300px;
   height: 300px;
}Here's the output:
As can be seen in the link above, each line looks great, just as it should. Superb!
With this, we are finally done with our design stage and so what's left now is just to set up the logic to create a grid out of these lines.
As per the exercise's description above, below we define the function createGrid() along with default-value normalizations and the error-checks for the given arguments:
function createGrid(element, lineDistance, isThick) {
   // lineDistance and isThick are both optional.
   lineDistance = (lineDistance === undefined) ? 10 : lineDistance;
   isThick = (isThick === undefined) ? false : isThick;

   if (!(element instanceof Element)) {
      throw new TypeError('The first argument must be an element node.');
   }
   if (typeof lineDistance !== 'number' || !(5 <= lineDistance && lineDistance <= 100)) {
      throw new TypeError('The second optional argument must be a number in the range 5-100.');
   }
   if (typeof isThick !== 'boolean') {
      throw new TypeError('The third optional argument must be a Boolean.')
   }
}
So far, so good.
Moving on, let's now focus on setting up the vertical lines. If we can successfully do this, then setting up the horizontal lines would be pretty straightforward.
So where to begin?
Well, one option is to start creating vertical lines from the left edge of the element with the required distance between them. But as stated in the description above, the origin of the grid must be at the very center of the given element and with the approach above, where we start laying out lines from the left edge of the element, this won't be peaches and cream for us!
A much simpler approach is to start off at the center of the element, placing the main grid line. Once that is done, then we must place a grid line on both of its sides until we reach a point where placing another line would take us out of the bounds of the element's width.
Hmm. This sure seems a reasonable approach, doesn't it?
Now, let's first decide on what exactly will we need for this approach.
Well, amongst many things we'll need the horizontally center position of the element where we ought to begin adding our grid lines. This can very easily be computed as follows:
elementWidth / 2
where elementWidth is the width of the element, in pixels.
For instance, if the element is 300px wide, then the center would precisely be at 150px from the left edge of the element.
But this ain't the position where the grid line should actually be placed. We have to take the width of the grid line into account as well.
For instance, consider the demonstrative figure below. We are supposing that a line is 100px wide (which is unrealistic but only for the sake of understanding the geometry correctly).
The line has been positioned at a distance of 150px from the left edge of the blue box, which is itself 300px wide, yet it's visually apparent that the line isn't centralized correctly. The problem is that we haven't considered the width of the line itself in the positioning.
To centralize the line properly, we need to bring it back by 50px (half of 100px) from the position shown above.
The figure below shows this configuration:
And as you can see now, the line clearly seems to be at the center of the element. Perfect!
Following this very idea, in the code below, we define a variable position to hold the position where we'll start laying out our vertical grid lines:
function createGrid(element, lineDistance, isThick) {
   /* ... */

   // A thick grid line is 2px wide, a normal one is 1px wide.
   var gridLineThickness = isThick ? 2 : 1;

   var clientRect = element.getBoundingClientRect();
   var position = clientRect.width / 2 - gridLineThickness / 2;
}
As we know, the computation of position requires us to consider the thickness of a grid line, and that's what the variable gridLineThickness is defined for. If isThick is true, each line is 2px wide, hence the value 2. Otherwise, each line is 1px wide, and hence the value 1.
The clientRect variable holds a DOMRect for the given element, from which we'll be able to query its absolute width, in pixels.
DOMRect inside a variable is because we'll need it later on as well when setting up horizontal grid lines, where the height of the element will be required instead of its width.With position defined, next up, we'll set up a while loop in order to add the grid lines inside the element as long as we remain within it.
But before this, let's first define a second function to create a new grid line. Note that as discussed above, we ought to know about four things before creating a grid line:
- Whether it's horizontal or vertical.
- Whether it's thick (2px wide) or normal (1px wide).
- Whether it's the main line.
- Whether it's a fifth line.
So based on this, below we define the function getGridLineElement() that takes three arguments and returns back a <div> element node for the respective grid line:
function getGridLineElement(direction, isThick, i) {
   var gridLineElement = document.createElement('div');
   gridLineElement.classList.add('grid_line');
   gridLineElement.classList.add(`grid_line--${direction}`);
   if (isThick) {
      gridLineElement.classList.add('grid_line--thick');
   }
   if (i === 0) {
      gridLineElement.classList.add('grid_line--main')
   }
   else if (i % 5 === 0) {
      gridLineElement.classList.add('grid_line--sub-main')
   }
   return gridLineElement;
}
Here's what purpose each of the parameters serves:
directionis either'hz'or'vt'and is used to add a class to the grid line element based on the fact whether it's a horizontal or a vertical line, respectively.isThickis the sameisThickvalue that we saw increateGrid(). It's used to add the class.grid_line--thickto the grid line created.iis a number specifying which line are we currently creating. For instance, the value0means that we are creating the main line, the value10means that we are creating the tenth line (which must be.grid_line--sub-main), and so on.
Coming back to the while loop, its whole idea for creating vertical lines is very simple, as detailed below:
left style property to position, update position to the new position of the next grid line, and end the loop once position becomes larger than the width of the given element.Simple?
Consider the following code where we set up the while loop:
function createGrid(element, lineDistance, isThick) {
   /* ... */

   var gridLineThickness = isThick ? 2 : 1;

   var clientRect = element.getBoundingClientRect();
   var position = clientRect.width / 2 - gridLineThickness / 2;

   var fragment = document.createDocumentFragment();
   var i = 0;

   // Creating vertical lines.
   while (position <= clientRect.width) {
      var gridLineElement = getGridLineElement('vt', isThick, i);
      gridLineElement.style.left = `${position}px`;
      fragment.appendChild(gridLineElement);

      position += lineDistance + gridLineThickness;
      i++;
   }

   element.appendChild(fragment);
}
Let's understand some of the new things added here:
fragmentholds a document fragment. Its purpose is to temporarily hold all the grid lines before we dump them straight into the underlying element.iis a counter for the grid lines. It's passed on to thegetGridLineElement()function so that it could create the desired kind of a grid line.- The
leftCSS style property of the grid line is set topositionin line 15. - Line 18 updates the value of
positionby addinglineDistanceandgridLineThicknessto its current value. Why do you think we addgridLineThicknesshere?
Now, let's pause here for a moment, create a <div> element to be filled up with a grid, and test createGrid() as defined thus far, on that <div>.
This is accomplished below:
<div id="d1"></div>#d1 {
background-color: #f1f1f1;
overflow: hidden;
position: relative;
width: 300px;
height: 300px;
}function createGrid(element, lineDistance, isThick) { /* ... */ }
createGrid(document.querySelector('#d1'), 6, true);Great. We're almost on the right track.
The lines to the right of the main line are showing up just as needed; it's only that there is nothing to the left of the main line. And that's because we haven't added anything over there!
So how to do that?
Well, one very intelligent approach is that whatever we add a line to the right of the main grid line, we add a mirror line to its left.
The mirroring part can very easily be done via cloneNode() while the position of the line can be represented using another variable, let's call it position2.
The code below adds grid lines to the left of the main line:
function createGrid(element, lineDistance, isThick) {
   /* ... */

   var gridLineThickness = isThick ? 2 : 1;

   var clientRect = element.getBoundingClientRect();
   var position = clientRect.width / 2 - gridLineThickness / 2;
   var position2 = position;

   var fragment = document.createDocumentFragment();
   var i = 0;

   // Creating vertical lines.
   while (position <= clientRect.width) {
      var gridLineElement = getGridLineElement('vt', isThick, i);
      gridLineElement.style.left = `${position}px`;
      fragment.appendChild(gridLineElement);

      // Add a mirror line to the left side.
      gridLineElement = gridLineElement.cloneNode();
      gridLineElement.style.left = `${position2}px`;
      fragment.appendChild(gridLineElement);

      position += lineDistance + gridLineThickness;
      position2 += -lineDistance - gridLineThickness;
      i++;
   }

   element.appendChild(fragment);
}
Now there's a slight problem in here. Can you spot it?
Well, it's just that we create two main lines instead of one. Now, to prevent this, we just ought to check the value of i before executing the block of code that we added just right now.
This is done below:
function createGrid(element, lineDistance, isThick) {
   /* ... */

   // Creating vertical lines.
   while (position <= clientRect.width) {
      var gridLineElement = getGridLineElement('vt', isThick, i);
      gridLineElement.style.left = `${position}px`;
      fragment.appendChild(gridLineElement);

      if (i !== 0) {
         // Add a mirror line to the left side, if it's not the main line.
         gridLineElement = gridLineElement.cloneNode();
         gridLineElement.style.left = `${position2}px`;
         fragment.appendChild(gridLineElement);
      }

      position += lineDistance + gridLineThickness;
      position2 += -lineDistance - gridLineThickness;
      i++;
   }

   element.appendChild(fragment);
}
And voila! We've successfully laid out the vertical grid lines. You can check it right below:
Now, we can copy/paste the same code to set up the horizontal grid lines, obviously with a couple of changes here and there.
The following code deals with the horizontal grid lines.
function createGrid(element, lineDistance, isThick) {
   /* ... */

   var gridLineThickness = isThick ? 2 : 1;
   var clientRect = element.getBoundingClientRect();
   var fragment = document.createDocumentFragment();

   // Creating vertical lines.
   var position = clientRect.width / 2 - gridLineThickness / 2;
   var position2 = position;
   var i = 0;

   while (position <= clientRect.width) {
      /* ... */
   }

   // Creating horizontal lines.
   position = clientRect.height / 2 - gridLineThickness / 2;
   position2 = position;
   i = 0;

   while (position <= clientRect.height) {
      gridLineElement = getGridLineElement('hz', isThick, i);
      gridLineElement.style.top = `${position}px`;
      fragment.appendChild(gridLineElement);

      gridLineElement = gridLineElement.cloneNode();
      gridLineElement.style.top = `${position2}px`;
      fragment.appendChild(gridLineElement);

      position += lineDistance + gridLineThickness;
      position2 += -lineDistance - gridLineThickness;
      i++;
   }

   element.appendChild(fragment);
}It works perfectly.
DRYing the code
Now although, we are able to get away with the whole exercise by a mere copy/paste of code, that's not where we'll end this discussion. More than often, copy/pasting is an instance of poor and inefficient programming.
The principle of producing DRY (Don't Repeat Yourself) code shall always be kept in mind.
Clearly, we are repeating a lot in the code above. A change in one while loop has to be manually made in the other one as well. This is completely unacceptable and undesirable.
What we'll now do is analyze both the blocks of code and see where they differ. Then, we'll amalgamate both the blocks into one single block of code and then use a methodology to automatically change those things.
Here's the rectified code below:
function createGrid(element, lineDistance, isThick) {
   /* ... */

   var gridLineThickness = isThick ? 2 : 1;
   var clientRect = element.getBoundingClientRect();
   var fragment = document.createDocumentFragment();

   var clientRectProperties = ['width', 'height'];
   var styleProperties = ['left', 'top'];
   var gridLineDirections = ['vt', 'hz'];

   for (var a = 0; a < 2; a++) {
      var position = clientRect[clientRectProperties[a]] / 2 - gridLineThickness / 2;
      var position2 = position;
      var i = 0;

      while (position <= clientRect[clientRectProperties[a]]) {
         gridLineElement = getGridLineElement(gridLineDirections[a], isThick, i);
         gridLineElement.style[styleProperties[a]] = `${position}px`;
         fragment.appendChild(gridLineElement);

         gridLineElement = gridLineElement.cloneNode();
         gridLineElement.style[styleProperties[a]] = `${position2}px`;
         fragment.appendChild(gridLineElement);

         position += lineDistance + gridLineThickness;
         position2 += -lineDistance - gridLineThickness;
         i++;
      }
   }

   element.appendChild(fragment);
}
Notice the following additional variables here:
clientRectPropertiesholds the two property names that we query onclientRect.stylePropertiesholds the two property names that we use to position a particular grid line.gridLineDirectionsholds the two directions of a grid line, i.e.'vt'and'hz'.
Using these three lists and, of course, a for loop, we are able to replicate the block of code for the two kinds of grid lines, i.e. vertical and horizontal, without actually repeating anything in the code.
Let's see the output produced by this code:
And it's the exact same as before. Great job!
Now this is what we call an instance of flexible and efficient coding.

